Enhancing StarlingX through Harbor as a Secure Container Registry solution
Harbor enhances StarlingX’s capabilities by offering robust, secure management of container images and cloud-native artifacts. In this blog post you will learn about how to use Harbor as a container registry in StarlingX 10.0.
About Harbor
Harbor is an open-source container registry that enhances security by implementing policies and role-based access control. It ensures images are vulnerability-free through scanning and provides image signing for trust verification.
With the 2.0 release, Harbor becomes the first OCI (Open Container Initiative)-compliant open-source registry capable of storing a wide range of cloud-native artifacts, including container images, Helm charts, OPAs, and Singularity, among others. Helm charts can now be pushed directly to Harbor using Helm3, eliminating the need for separate hosting in ChartMuseum. Instead, they are stored alongside container images under artifacts.
Check out the StarlingX documentation for further details on Harbor as a system application in the platform.
What can you do with Harbor
As an administrator, use Harbor if you want to streamline your artifact management, enhance security, and maintain compliance in your cloud-native environment. Here’s how Harbor can help you achieve these goals:
- Store a Wide Range of Artifacts: This unified storage simplifies the management of multiple artifact types, allowing users to access and manage all their artifacts in one place.
- Enhance Security with Vulnerability Scanning: Automate vulnerability scanning to ensure the integrity of your artifacts. You can configure Harbor to scan images for vulnerabilities and ensure only trusted and verified images are used in production. This is vital for maintaining security in dynamic, cloud-native environments.
- Implement Role-Based Access Control (RBAC): Harbor allows you to enforce security policies through role-based access control. By assigning roles with specific permissions, you can ensure that users only have access to the artifacts and resources they need, reducing the risk of accidental or malicious changes to critical systems.
- OCI Compliance for Interoperability: Being OCI-compliant, Harbor enhances cross-platform interoperability. It allows you to replicate and share container images and other artifacts across OCI-compliant registries, making it a flexible option for managing resources in hybrid and multi-cloud setups.
- Artifact Signing with Notary v2: Harbor provides the ability to sign container images and artifacts, ensuring that they are tamper-proof and can be trusted. With the integration of Notary v2, Harbor further improves artifact verification processes, ensuring that only trusted content is used.
- Artifact Replication Across Registries: Harbor’s replication feature enables users to replicate their artifacts to and from other Harbor instances or OCI-compliant registries. This is particularly useful for organizations managing multiple data centers or operating in a multi-cloud environment, as it simplifies artifact distribution.
Harbor 2.0 extends its usefulness beyond just being a container image registry, making it a versatile solution for managing various cloud-native artifacts with a strong emphasis on security, compliance, and ease of use.
This combination of features makes Harbor an ideal solution for organizations adopting cloud-native architectures, providing them with a secure, flexible, and robust tool for artifact management.
How can you utilize Harbor Container Registry in StarlingX
Harbor is packaged as a system application and included in the StarlingX installation ISO. In order to enable Harbor container registry, you can upload and apply the Harbor system application.
This blog post will use All-in-one Simplex (AIO-SX) deployment. You are going to perform the following steps:
- Deploy the Harbor system application
- Expose the application using nodePort
- Push an image and a Helm chart to the registry
- Scan the image using default Trivy scanner
- Pull an image
Deploy the Harbor system application
In this blog post, Harbor should be exposed using nodePort.
-
Create harbor namespace.
~(keystone_admin)]$ kubectl create namespace harbor - Generate certificates and create a secret. You can obtain an OAM floating IP address by running 'system oam-show' command.
Please make sure to replace the 'harbor.yourdomain.com' URL with the harbor URL and make sure it has been configured in the DNS server owning the DNS as the OAM FLOATING IP address of StarlingX.
~(keystone_admin)]$ cat <<EOF > harbor-certificate.yaml
---
apiVersion: cert-manager.io/v1
kind: Certificate
metadata:
  name: harbor-certificate
  namespace: harbor
spec:
  secretName: harbor-tls
  issuerRef:
    name: system-local-ca
    kind: ClusterIssuer
  duration: 2160h # 90 days
  renewBefore: 360h # 15 days
  commonName: 10.20.2.3 # oam floating IP address
  subject:
    organizations:
      - ABC-Company
    organizationalUnits:
      - StarlingX-harbor
  ipAddresses:
  - 10.20.2.3 # oam floating IP address
  dnsNames:
  - harbor.yourdomain.com # e.g. harbor dns
EOF

~(keystone_admin)]$ kubectl apply -f harbor-certificate.yaml
-
Verify if the certificate’s 'Ready' status is 'True'.
~(keystone_admin)]$ kubectl get certificate harbor-certificate -n harbor NAME READY SECRET AGE harbor-certificate True harbor-tls 89s -
Locate the Harbor system application tarball in /usr/local/share/applications/helm and upload it.
~(keystone_admin)]$ ls /usr/local/share/applications/helm | grep harbor harbor-24.09-16.tgz ~(keystone_admin)]$ system application-upload /usr/local/share/applications/helm/harbor-24.09-16.tgz -
Configure the Helm overrides for Harbor and apply the Harbor system application. The below example uses nodePorts 30002, 30003, and 30004. If these ports are unavailable, please choose and configure alternative ports that are not in use.
~(keystone_admin)]$ cat <<EOF > values.yaml expose: type: nodePort tls: enabled: true certSource: secret secret: secretName: "harbor-tls" # A secret we have created in step 2 notarySecretName: "harbor-tls" # A secret we have created in step 2 nodePort: # The name of NodePort service name: harbor ports: http: # The service port Harbor listens on when serving HTTP port: 80 # The node port Harbor listens on when serving HTTP nodePort: 30002 https: # The service port Harbor listens on when serving HTTPS port: 443 # The node port Harbor listens on when serving HTTPS nodePort: 30003 # Only needed when notary.enabled is set to true notary: # The service port Notary listens on port: 4443 # The node port Notary listens on nodePort: 30004 externalURL: https://harbor.yourdomain.com:30003 # URL of harbor listing on 30003 port harborAdminPassword: "Harbor12345" EOF ~(keystone_admin)]$ system helm-override-update harbor harbor harbor --values values.yaml ~(keystone_admin)]$ system application-apply harbor -
The 'system application-apply' command may take few minutes. Please verify if application status is applied.
~(keystone_admin)]$ system application-show harborAt this point Harbor is installed and exposed on nodePort 30003. You can now use it to store artifacts.
Push a container image to the registry
Default configuration contains a public repository 'library', we will use this to store the images. Depending on your Docker setup, you may be required to run all of the following commands with ‘sudo’. The default admin username is ‘admin’, and the password is ‘Harbor12345’. You should change the password soon after installing Harbor. You may change it by changing the 'harborAdminPassword' value in step 5 above.
~(keystone_admin)]$ sudo docker login https://harbor.yourdomain.com:30003 -u admin
Password:
WARNING! Your password will be stored unencrypted in /root/.docker/config.json.
Configure a credential helper to remove this warning. See
https://docs.docker.com/engine/reference/commandline/login/#credentials-store

Login Succeeded

 ~(keystone_admin)]$ sudo docker pull redis:latest
latest: Pulling from library/redis
302e3ee49805: Pull complete
5d0249d9189d: Pull complete
4825c5e95815: Pull complete
b0ce50685fa2: Pull complete
455886c7d31b: Pull complete
96377887d476: Pull complete
4f4fb700ef54: Pull complete
5fac73c23c9b: Pull complete
Digest: sha256:6725a7dc7a44a6486b9d0a5172b10ccaf0c2ea600df87c0b93450d0e7769297f
Status: Downloaded newer image for redis:latest
docker.io/library/redis:latest

 ~(keystone_admin)]$ sudo docker tag redis:latest harbor.yourdomain.com:30003/library/redis:latest

 ~(keystone_admin)]$ sudo docker push harbor.yourdomain.com:30003/library/redis:latest
The push refers to repository [harbor.yourdomain.com:30003/library/redis]
2f1dc4a31b6f: Pushed
5f70bf18a086: Pushed
5c6b18089c89: Pushed
fa65e4be9d35: Pushed
a71dbd37c9b5: Pushed
2327eaf97cce: Pushed
6f55c091a296: Pushed
8d853c8add5d: Pushed
latest: digest: sha256:2f4b8bcfa2f4c8dcfafa4925c7d416f70692254617911f6e4f3ceaedf63313d9 size: 1986
Verify on the GUI if the image is pushed to the 'library' registry. Open https://harbor.yourdomain.com:30003 in your browser and log in using 'admin' and password.

Push a Helm chart to the registry
 ~(keystone_admin)]$ helm create my-test-app
 ...
Creating my-test-app
sysadmin@controller-0:~$ helm package my-test-app/
...
Successfully packaged chart and saved it to: /home/sysadmin/my-test-app-0.1.0.tgz
 ~(keystone_admin)]$ sudo helm push /home/sysadmin/my-test-app-0.1.0.tgz oci://harbor.yourdomain.com:30003/library/
Password:
Pushed: harbor.yourdomain.com:30003/library/my-test-app:0.1.0
Digest: sha256:50f76c90e281789cb1da0364a78dfec6744c49db1541b611d6a2965a3b6fd8ba
Verify the Helm chart by opening https://harbor.yourdomain.com:30003 in browser and login using 'admin' and password.

Scan the image using Trivy scanner
Trivy scanner is the default image scanner. With Trivy, StarlingX users can ensure that all deployed images are thoroughly scanned for vulnerabilities before reaching production. Trivy offers extensive coverage for scanning various operating systems and application package managers, making it easy to integrate into CI/CD pipelines. It performs thorough scans, detecting vulnerabilities across widely used distributions such as CentOS, Photon OS, Debian, and Ubuntu, among others.
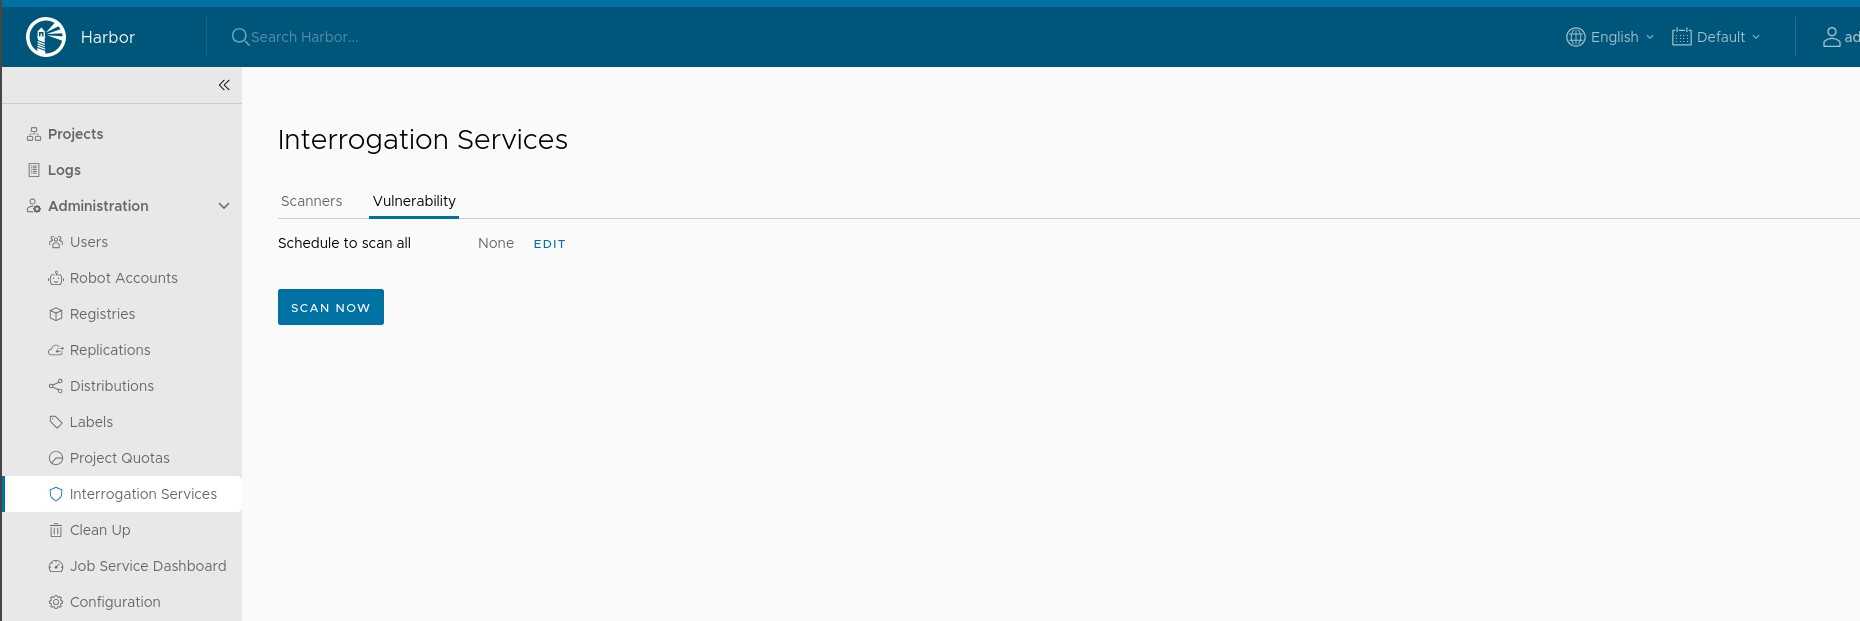
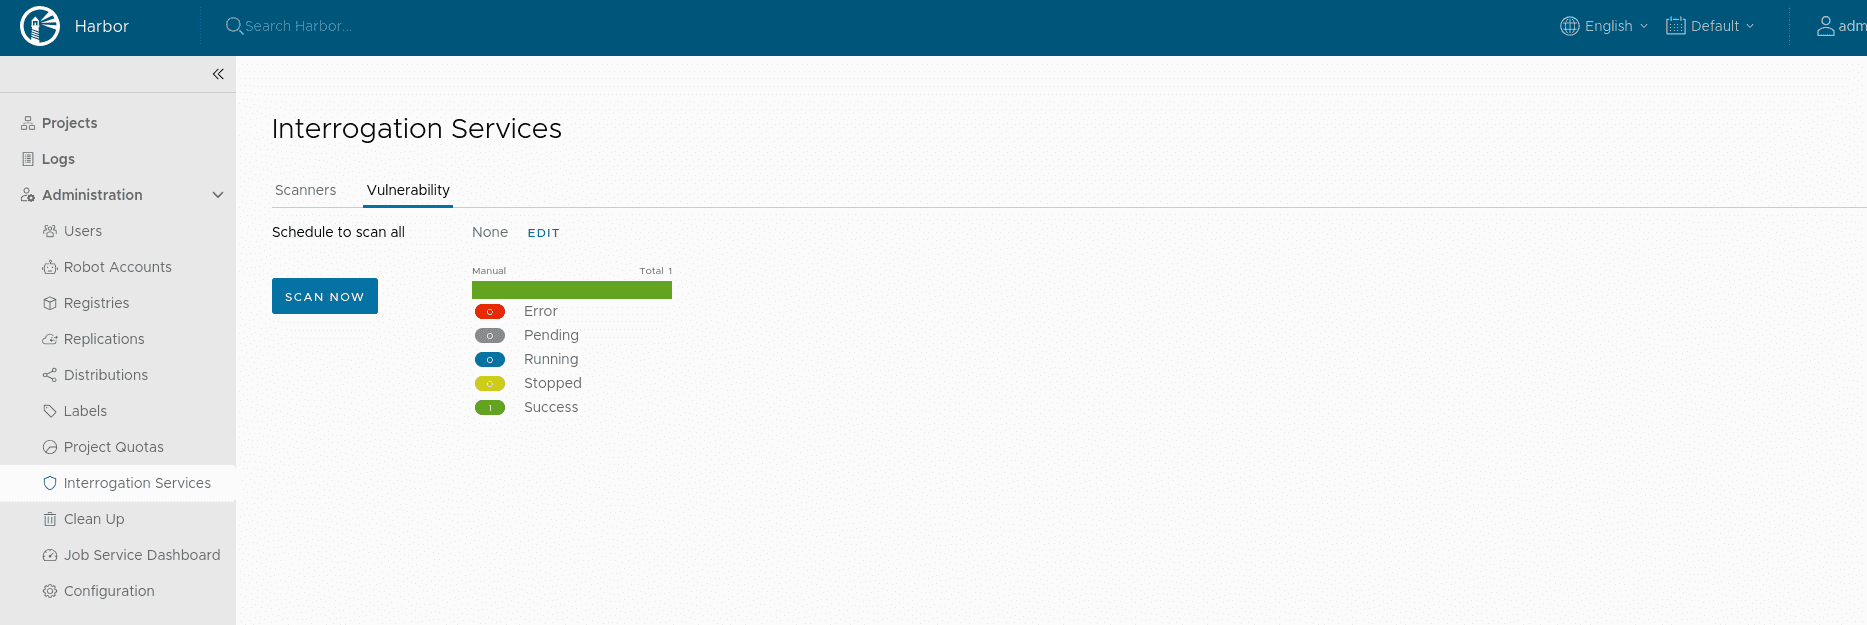
- Start a scan: Go to "integration services" and click on the "vulnerability" tab and start a scan.

- Check the scan result: Once the scan is done you can check the result in the GUI.

Pull a container image and Helm chart from the registry
You can pull the images and Helm charts using 'docker pull' and 'helm pull' commands respectively.
$ sudo docker pull  harbor.yourdomain.com:30003/library/redis:latest
latest: Pulling from library/redis
Digest: sha256:2f4b8bcfa2f4c8dcfafa4925c7d416f70692254617911f6e4f3ceaedf63313d9
Status: Downloaded newer image for harbor.yourdomain.com:30003/library/redis:latest
harbor.yourdomain.com:30003/library/redis:latest

$ helm pull oci://harbor.yourdomain.com:30003/library/my-test-app
...
Pulled: harbor.yourdomain.com:30003/library/my-test-app:0.1.0
Digest: sha256:50f76c90e281789cb1da0364a78dfec6744c49db1541b611d6a2965a3b6fd8ba
Integrating Harbor as a container registry into StarlingX significantly enhances its capabilities by providing a secure, OCI-compliant solution for managing cloud-native artifacts. Harbor strengthens StarlingX's overall functionality with features such as vulnerability scanning and artifact signing. These security measures ensure that only trusted and verified container images and Helm charts are used within the platform. Additionally, Harbor simplifies artifact management by supporting multiple types of cloud-native artifacts, improving interoperability and streamlining operations in hybrid and multi-cloud environments. For further information about the features, check out the Harbor Container Registry section in the StarlingX documentation.
About StarlingX
If you would like to learn more about the project and get involved check the website for more information or download the code and start to experiment with the platform. If you are already evaluating or using the software please fill out the user survey and help the community improve the project based on your feedback.